Creating your own lip balm is not only a practical and cost-effective solution but also a delightful and rewarding DIY project. With a few simple ingredients and some creative flair, you can craft lip balms that are personalized to your preferences and offer nourishment and protection to your lips. In this comprehensive guide, we will take you through the step-by-step process of making your own lip balm from scratch. From selecting the right ingredients and tools to customizing the formulation and exploring different variations, you’ll gain the knowledge and confidence to create high-quality lip balms that leave your lips soft, hydrated, and rejuvenated.
Lip balm is a skincare essential, especially in harsh weather conditions or dry climates, as it helps to lock in moisture and prevent dryness, chapping, and cracking. By making your own lip balm, you have full control over the ingredients, ensuring that you’re using natural, nourishing, and chemical-free substances. Additionally, crafting your own lip balm allows you to experiment with different scents, flavors, colors, and textures, enabling you to create a personalized product that reflects your unique style and preferences.
Whether you’re a DIY enthusiast looking to explore the world of homemade skincare products or simply seeking a fun and creative project, making your own lip balm is an excellent choice. Not only will you gain a deeper understanding of the ingredients that go into your lip care products, but you’ll also experience the joy of using a lip balm that is crafted with love and tailored to your needs. So, let’s dive into the art of creating your own lip balm and discover the endless possibilities for healthy and luscious lips.
Gathering Ingredients and Tools
Before you begin making your lip balm, gather all the necessary ingredients and tools. The main ingredients you’ll need are a base oil, such as coconut oil or sweet almond oil, beeswax or a plant-based wax for solidifying the lip balm, and essential oils or flavor oils for scent and taste. You’ll also need containers for storing the lip balm, a heat-resistant glass or metal bowl, a saucepan or double boiler, a stirring utensil, a scale for measuring the ingredients, and a pipette or small spoon for transferring the mixture.
Choosing Your Lip Balm Recipe
There are various lip balm recipes available, each with different ingredient ratios and customization options. Consider your preferences and needs when choosing a recipe. For example, if you prefer a vegan lip balm, look for plant-based wax options instead of beeswax. If you have sensitive skin, opt for milder essential oils or fragrance-free lip balm. You can also adjust the amount of wax and oil in the recipe to create a softer or firmer lip balm consistency.
Melting and Mixing the Ingredients
Once you have your ingredients ready, it’s time to melt and mix them together. Create a makeshift double boiler by filling a saucepan with a few inches of water and placing a heat-resistant bowl on top. Heat the water over medium-low heat and add the wax and base oil to the bowl. Stir occasionally until the wax is completely melted. Once melted, remove the bowl from heat and add the essential oils or flavor oils, stirring well to incorporate them into the mixture. Take care not to overheat the ingredients to preserve their beneficial properties.
Pouring the Mixture into Containers
With the lip balm mixture fully combined, it’s time to pour it into your chosen containers. Carefully transfer the mixture into small lip balm containers or tubes, using a pipette or small spoon. Fill each container almost to the top, leaving a small space for the mixture to settle. Work quickly, as the mixture may start to solidify as it cools. Avoid touching the inside of the containers with the mixture to maintain hygiene and extend the shelf life of your lip balm.
Allowing the Lip Balm to Set
After filling the containers, allow the lip balm to cool and solidify completely. You can place the containers on a flat surface or in the refrigerator to speed up the process. It’s important to let the lip balm set undisturbed for a few hours to ensure a smooth and even consistency. Once the lip balm is firm and solid, you can cap the containers and label them with the date and any additional information, such as the scent or flavor.
Customizing Your Lip Balm
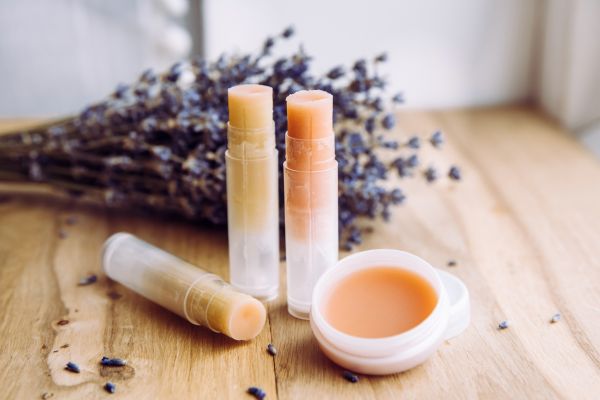
One of the joys of making your own lip balm is the ability to customize it according to your preferences. Experiment with different essential oils, such as peppermint, lavender, or citrus, to create unique scents and aromatherapy benefits. You can also add natural colorants, such as beetroot powder or cocoa powder, to give your lip balm a hint of color. Consider incorporating nourishing ingredients like shea butter or vitamin E oil for added moisturizing properties.
Storing and Using Your Lip Balm
To ensure the longevity and effectiveness of your homemade lip balm, store it in a cool and dry place away from direct sunlight. This helps prevent melting or changes in texture. When using your lip balm, apply a small amount to your lips and gently massage it in. Reapply as needed throughout the day to keep your lips hydrated and protected. Enjoy the feeling of nourished and moisturized lips with your very own homemade lip balm.
Conclusion
Congratulations! You’ve learned the art of making your own lip balm from start to finish. By following this step-by-step guide, you can create personalized lip balms that cater to your preferences and provide the nourishment your lips deserve. From gathering the ingredients and tools to customizing the recipe and pouring the mixture into containers, each stage allows you to unleash your creativity and care for your lips in a natural and sustainable way.
Not only does DIY lip balm save you money and reduce your reliance on store-bought products, but it also gives you the satisfaction of creating something unique and handmade. Share your homemade lip balms with friends and family, or make them as thoughtful gifts for special occasions. Remember to experiment with different flavors, scents, and ingredients to find your signature lip balm recipe.
So, let your creativity flow, gather your ingredients and tools, and embark on the journey of making your own lip balm. Enjoy the nourishing and moisturizing benefits of your homemade creation and revel in the knowledge that you’ve mastered the art of crafting a lip balm that is tailored to your needs. Happy lip balm making!