Building a bookshelf is a rewarding and fulfilling DIY project that allows you to showcase your creativity and craftsmanship while providing a practical storage solution for your books and belongings. Whether you’re an experienced woodworker or a novice DIY enthusiast, this comprehensive guide will walk you through the step-by-step process of building a bookshelf from scratch. From selecting the right materials to mastering essential woodworking techniques, you’ll gain the knowledge and confidence to create a beautiful and functional bookshelf that perfectly fits your space and style.
A bookshelf is more than just a piece of furniture; it’s a statement of personal taste and a reflection of your unique style. Building your own bookshelf allows you to customize the design, size, and finish to match your specific preferences and the overall aesthetics of your home. Whether you prefer a modern and minimalist look or a rustic and vintage charm, the possibilities are endless when it comes to creating a bookshelf that is both functional and visually appealing.
In this guide, we will explore the essential steps involved in building a bookshelf. From planning and measuring to cutting and assembly, you’ll learn the foundational techniques and tools required for a successful DIY project. We’ll also discuss different design options, finishing touches, and additional customization ideas to help you create a bookshelf that not only serves its purpose but also becomes a focal point in your space. So, let’s roll up our sleeves, grab our tools, and embark on the exciting journey of building a bookshelf that will bring organization and beauty to your home.
Gathering Materials and Tools
To start your bookshelf project, gather all the necessary materials and tools. Select high-quality wood or plywood that suits your design and budget. Consider factors such as durability, aesthetics, and availability when making your choice. You’ll also need essential tools like a tape measure, circular saw or miter saw, drill, screws, clamps, and sandpaper. Take stock of your existing tools and purchase or borrow any missing items. Additionally, make a list of other materials and hardware you’ll need, such as wood glue, wood filler, and shelf brackets.
Planning and Design
Before diving into the construction process, spend time planning and designing your bookshelf. Consider the available space and determine the dimensions that will best suit your needs. Think about the height, width, and depth of the bookshelf, as well as the number of shelves required. Sketch out your design, incorporating any unique elements or features you desire. Take into account the overall style and theme of your room to ensure a cohesive look. A well-thought-out plan will serve as your blueprint throughout the project, guiding you towards a successful outcome.
Measuring and Marking
Accurate measurements are crucial for a well-fitting and visually appealing bookshelf. Use a tape measure to measure the dimensions of the wood pieces required for your design. Double-check your measurements to avoid any errors. Once you have the measurements, mark the wood accordingly. Use a pencil and a square or straightedge to create precise lines. These markings will guide you during the cutting, joinery, and assembly stages. Taking the time to measure and mark accurately will result in a professional-looking bookshelf.
Cutting the Wood
With the measurements and markings in place, it’s time to cut the wood pieces for your bookshelf. Use a circular saw or a miter saw for straight cuts, ensuring that the saw blade is set to the appropriate depth. For angled cuts, adjust the saw accordingly and follow your marked lines precisely. Always prioritize safety when working with power tools. Wear protective gear, such as safety glasses and ear protection, and be aware of your surroundings. Take your time and make smooth and accurate cuts to achieve the desired results.
Sanding and Smoothing
Once the wood pieces are cut, it’s essential to sand and smooth the surfaces for a polished look and a splinter-free finish. Start with a coarse-grit sandpaper to remove any rough edges or imperfections. Gradually switch to finer-grit sandpaper to achieve a smooth and even surface. Pay special attention to the corners and edges to ensure they are rounded and smooth. After sanding, wipe away any dust or debris and inspect the wood for a flawless finish. Sanding is a critical step that prepares the wood for staining or painting and enhances the overall appearance of your bookshelf.
Joinery Techniques
Joinery refers to the methods used to connect wood pieces together. There are various joinery techniques to choose from, depending on your skill level and the desired strength and aesthetics of your bookshelf. Common joinery methods include butt joints, pocket-hole joinery, dowel joints, and dado joints. Each technique has its advantages and considerations, such as ease of assembly, strength, and visibility of the joints. Research and choose the joinery method that best suits your project and skill level. Practice on scrap wood before applying the joinery to your bookshelf.
Assembling the Bookshelf
With the wood pieces cut, sanded, and joined together, it’s time to assemble your bookshelf. Begin by laying out the pieces according to your design and following your plans. Use clamps to hold the pieces in place while drilling pilot holes and driving screws. Follow the assembly sequence carefully to ensure the correct alignment and stability of the bookshelf. Double-check the squareness of the bookshelf using a carpenter’s square or a measuring tape. Make any necessary adjustments before tightening all the screws. Assemble the shelves, backboard, and any additional features according to your design.
Finishing Touches
Once the bookshelf is assembled, it’s time to add the finishing touches that will enhance its appearance and protect the wood. Consider staining or painting the bookshelf to match your room’s decor. Choose a finish that is durable and complements the natural beauty of the wood. Apply the finish evenly, following the manufacturer’s instructions, and allow it to dry completely before handling or moving the bookshelf. Consider adding decorative elements such as trim, moldings, or hardware to give your bookshelf a personalized touch. These finishing touches will elevate the overall look of your project and make it truly unique.
Mounting the Bookshelf
If you plan to mount the bookshelf to a wall, it’s essential to do so securely and safely. Determine the appropriate height and location for the bookshelf, taking into account factors such as weight distribution and wall structure. Use wall anchors or screws designed for heavy loads to secure the bookshelf to the wall studs. Follow the manufacturer’s instructions for proper installation. It’s always recommended to have someone assist you during the mounting process to ensure accuracy and safety.
Organizing and Styling
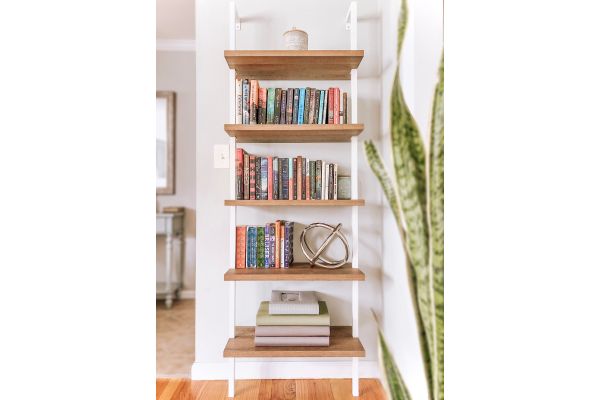
Once your bookshelf is securely in place, it’s time to organize your books and style the shelves. Consider arranging your books by genre, author, or color for a visually appealing display. Add decorative items such as vases, picture frames, or plants to add personality to your bookshelf. Experiment with different configurations until you achieve a layout that is aesthetically pleasing and functional. Regularly update and rearrange the items on your bookshelf to keep it fresh and engaging.
Conclusion
Building a bookshelf from scratch is a rewarding and fulfilling DIY project that allows you to showcase your craftsmanship and create a functional piece of furniture that is tailored to your style and needs. By following the step-by-step process outlined in this guide, you’ll acquire the essential skills and knowledge to embark on your bookshelf-building journey with confidence. From gathering materials and tools to designing, measuring, cutting, and assembling, each stage contributes to the successful completion of your project.
Remember, building a bookshelf requires patience, attention to detail, and a focus on safety. Take the time to plan, measure accurately, and make precise cuts. Pay attention to joinery techniques and take pride in assembling a sturdy and visually appealing bookshelf. The finishing touches and organization of your books and decorative items will give your bookshelf a personalized touch and make it a standout piece in your home.
Whether you’re a seasoned woodworker or a beginner, building a bookshelf is an opportunity to express your creativity and enhance your woodworking skills. Enjoy the process, embrace the challenges, and celebrate the sense of accomplishment that comes with creating a beautiful and functional piece of furniture. So, gather your tools, select your materials, and start building your very own bookshelf – a timeless piece that will bring organization and style to your space for years to come.