In today’s world, where personal expression and sustainability go hand in hand, creating DIY wall art from recycled materials has become a popular and rewarding endeavor. It offers a unique opportunity to unleash your creativity, while also contributing to the preservation of our environment. By transforming discarded items into stunning pieces of wall art, you can add a touch of individuality and eco-consciousness to your living space.
This comprehensive guide aims to inspire and guide you through the process of crafting your own DIY wall art using recycled materials. We will explore various techniques, tips, and ideas that will help you bring new life to items that would otherwise end up in landfills. From finding inspiration and collecting recycled materials to planning your design and incorporating colors and textures, we will take you on a creative journey where the possibilities are endless.
By embarking on this DIY adventure, not only will you unleash your inner artist, but you will also make a positive impact on the environment. Every piece of wall art you create from recycled materials is a statement of sustainability and a reflection of your unique style. So, let’s dive into the world of DIY wall art and discover how to turn discarded treasures into remarkable works of art that will make a statement in your home.
Finding Inspiration: Unleashing Your Creativity
When embarking on your DIY wall art project, it’s important to find inspiration that sparks your creativity. Look for sources that resonate with your personal style, such as magazines, websites, or even nature. Explore different art forms, colors, and patterns to discover what speaks to you. Allow yourself to think outside the box and embrace unconventional ideas to create truly unique and captivating wall art.
Collecting Recycled Materials: From Trash to Treasure
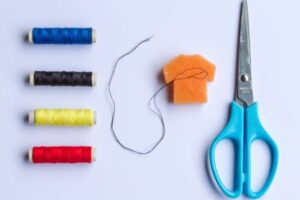
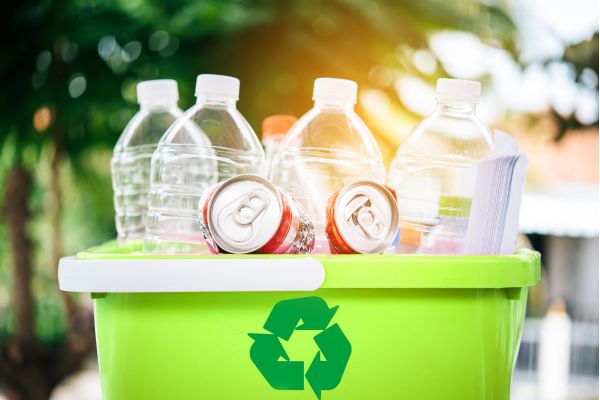
One of the most exciting aspects of DIY wall art is the opportunity to transform discarded materials into something beautiful. Start by collecting a variety of recycled materials, such as old picture frames, reclaimed wood, fabric scraps, bottle caps, or even broken ceramics. Visit thrift stores, yard sales, and online marketplaces to find hidden gems. Remember, what may seem like trash to others can become the centerpiece of your artwork.
Preparing and Prepping Materials: Cleaning and Treating Recycled Items
Before diving into your project, it’s important to clean and prepare the recycled materials properly. Remove any dirt, dust, or residue from surfaces and ensure they are in good condition for use. If necessary, repair or reinforce items to ensure their stability. Treat wooden pieces with sanding and sealing, and wash fabrics to freshen them up. Taking the time to prep your materials will ensure a smooth and successful DIY experience.
Choosing a Design: Planning Your DIY Wall Art
Now that you have your inspiration and materials ready, it’s time to plan your design. Consider the style and theme you want to achieve in your space. Sketch out your ideas and play with different arrangements and compositions. Think about the dimensions, colors, and textures that will bring your vision to life. Take measurements and visualize how the final piece will fit within your room’s aesthetic.
Incorporating Colors and Textures: Painting and Decorating Techniques
Color and texture play a significant role in the impact of your DIY wall art. Explore different painting techniques, such as acrylic pouring, stenciling, or freehand painting, to add depth and vibrancy to your piece. Consider incorporating various textures, such as fabric, paper, or natural elements like shells or twigs, to create tactile interest. Experiment with color combinations that complement your overall design and evoke the desired mood.
Assembling Your Artwork: Techniques for Putting It All Together
Once you have painted and decorated your individual components, it’s time to assemble them into a cohesive artwork. Lay out your materials and experiment with different arrangements until you find the perfect composition. Use adhesives, nails, or screws to secure the pieces together. Consider layering elements to add depth and visual interest. Take your time during this step to ensure everything is aligned and balanced.
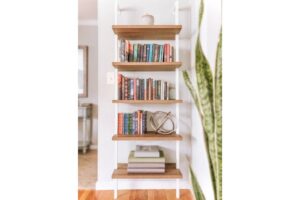
Creating Dimension: Adding Depth and Layers to Your Wall Art
To make your DIY wall art visually engaging, create dimension by incorporating layers. This can be achieved through various techniques such as adding raised elements, using shadowboxes, or creating a multi-panel artwork. Consider using foam boards, cardboard, or other materials to elevate certain elements and create a sense of depth. This technique adds visual intrigue and makes your artwork stand out from the flat surface of the wall.
Incorporating Natural Elements: Bringing the Outdoors In
Bringing elements of nature into your DIY wall art adds a unique and organic touch. Consider incorporating dried flowers, leaves, or branches into your design. You can also use natural materials like seashells, pebbles, or driftwood. These elements not only add texture but also connect your artwork to the beauty of the natural world. Be mindful of preserving and treating these materials to ensure their longevity.
Upcycling Everyday Objects: Turning Household Items into Art
Think beyond traditional art supplies and explore the potential of everyday household items. Repurpose items like old keys, buttons, bottle caps, or even discarded cutlery to create interesting and unexpected elements in your wall art. Let your imagination guide you as you transform these ordinary objects into extraordinary artistic expressions.
Hanging and Displaying Your DIY Wall Art: Showcasing Your Creations
The final step is to hang and display your DIY wall art. Consider the size, weight, and structure of your artwork to determine the best hanging method. Options include adhesive hooks, nails, picture hangers, or even a gallery-style hanging system. Pay attention to the balance and arrangement of multiple pieces if you’re creating a gallery wall. Step back and assess the placement to ensure it enhances the overall aesthetics of your space.
Conclusion
In conclusion, creating DIY wall art from recycled materials is a fulfilling and sustainable way to express your creativity and contribute to a greener future. Throughout this guide, we have explored various aspects of this artistic journey, from finding inspiration and collecting recycled materials to planning your design and incorporating colors and textures. By following these steps and embracing the joy of repurposing, you can transform ordinary objects into extraordinary pieces of art that reflect your personal style and values.
Engaging in DIY projects not only allows you to unleash your creativity but also promotes a sense of accomplishment and self-sufficiency. The satisfaction that comes from crafting something with your own hands and breathing new life into discarded materials is truly unparalleled. With each piece of DIY wall art you create, you become an advocate for sustainable living, inspiring others to consider alternative ways of decorating their spaces.
Moreover, the impact of your actions reaches beyond your own artistic endeavors. By repurposing materials and reducing waste, you actively contribute to the reduction of landfill waste and the conservation of our natural resources. You are making a positive difference in the world, one art piece at a time.
So, gather your materials, unleash your imagination, and embark on the journey of creating DIY wall art from recycled materials. Let your creativity soar as you transform discarded objects into stunning pieces that not only beautify your space but also tell a story of sustainability and innovation. Embrace the beauty of repurposing, and let your walls become a canvas for your artistic expression and your commitment to a greener future.